
저는 CentOS를 사용하기에 이를 기준으로 설명을 합니다.
#Zenoss의 간략한 설명#
Zenoss 코어는 업계에서 가장 강력한 오픈 소스 IT 모니터링 솔루션. 단일 사용 하, 웹 기반 콘솔 및 에이전트 기술, 우리 모니터링 하 고 네트워크 등 IT 인프라에서 성능 및 가용성의 모든 장치를 관리할 수 있습니다., 서버, 스토리지, 응용 프로그램, 통합된 인프라와 클라우드 환경. 그래서, Zenoss 오픈 소스 버전은 네트워크에서 모든 장치를 모니터링 하기 위한 한-그만-가 게-도구를 필요로 하는 네트워크 관리자에 대 한.
Zenoss 코어 버전 설치 하겠습니다. 4.2.5 Centos에 6 새로운 기능 및 향상 된 이벤트 및 RabbitMQ 메시징 프레임 워크의 구현으로 처리 하는 작업을 지원 하 여 제공 하는 최종 릴리스, 고급 사용자 인터페이스 및 nmap 기반 zenping 통해 더 이벤트 억제 구성 옵션.
# 하드웨어 최소 요구사항#
- Small Deployments (1 to 250 Monitored Devices)
- 4GB RAM
- 2 CPU Cores
- 1x 300GB, 10K RPM Drive
- Medium Deployments (250 to 500 Monitored Devices)
- 8GB RAM
- 4 CPU Cores
- 1x 300GB, 10K RPM Drive
Large Deployments (500 to 1000 Monitored Devices)
- 16GB – 32GB RAM
- 8 CPU Cores
- 1x 300GB, 15K RPM Drive
# Zenoss 모니터링 서버를 CentOS에 설치 #
1. Disable SELinux and IPtables
For this guide SELinux and IPtables were completely disabled and CentOS 6 was up-to-date!
(* selinux의 설명 http://blog.naver.com/shackerz/220375507309 참조)
2. Add DNS FQDN Entry and NTP Sync
To ensure proper resolving FQDN entries in DNS or /etc/hosts must exist and please configure NTP time synchronization for services to run properly.
3. Install Following Packages
Install the following packages to make your life a bit easier – especially if you are on CentOS 6 minimal install.
[root@centos1 ~]# yum install openssh-clients wget vim-enhanced
4. Install Zenoss Dependencies Repository
This RPM installs Zenoss Dependency Repository. It will help us resolve all of the dependencies required to install and run Zenoss.
[root@centos1 ~]# rpm -ivh http://deps.zenoss.com/yum/zenossdeps-4.2.x-1.el6.noarch.rpm
5. Install MySQL Repository
Zenoss requires MySQL database server. We will download and install the latest MySQL server version available.
[root@centos1 ~]# rpm -ivh http://dev.mysql.com/get/mysql-community-release-el6-5.noarch.rpm
6. Download and Install Oracle Sun Java
Download the latest Oracle Sun Java RPM from Java Downloads and transfer it to your server. Zenoss needs Oracle Java to run. Please install Oracle Sun Java RPM as follows.
[root@centos1 ~]# rpm -ivh jre-7u60-linux-x64.rpm
Preparing... ########################################### [100%]
 1:jre ########################################### [100%]
Unpacking JAR files...
 rt.jar...
 jsse.jar...
 charsets.jar...
 localedata.jar...
 jfxrt.jar...
Remove existing java links and recreate them, pointing to Oracle Sun Java binaries.
[root@centos1 ~]# rm /usr/bin/java /usr/bin/javaws
rm: remove symbolic link `/usr/bin/java'? y
rm: remove symbolic link `/usr/bin/javaws'? y
[root@centos1 ~]# ln -s /usr/java/latest/bin/java /usr/bin/java
[root@centos1 ~]# ln -s /usr/java/latest/bin/javaws /usr/bin/javaws
Check and make sure you are running Oracle Sun Java.
[root@centos1 ~]# java -version
java version "1.7.0_60"
Java(TM) SE Runtime Environment (build 1.7.0_60-b19)
Java HotSpot(TM) 64-Bit Server VM (build 24.60-b09, mixed mode)
7. Install and Start Latest MySQL Server
Install the latest version of MySQL server and start it but DO NOT set MySQL server root password yet! This will enable Zenoss to automatically populate MySQL database.
[root@centos1 ~]# yum install mysql-community-server
[root@centos1 ~]# /etc/init.d/mysqld start
8. Download and Install Latest Zenoss RPM
Download latest Zenoss RPM to your server and install it via “yum” to resolve dependencies.
[root@centos1 ~]# wget http://downloads.sourceforge.net/project/zenoss/zenoss-4.2/zenoss-4.2.5/zenoss_core-4.2.5-2108.el6.x86_64.rpm
[root@centos1 ~]# yum localinstall zenoss_core-4.2.5-2108.el6.x86_64.rpm
9. Start Postfix Service
Postfix or other mail server needs to run to enable sending of Zenoss emails alerts.
(*메일 연동부분으로 Postfix 및 기타 메일 서버가 필요함)
[root@centos1 ~]# /etc/init.d/postfix start
10. Start Zenoss for the First Time
Zenoss first run might take some time. Zenoss has to populate the database and install ZenPacks, please be patient…
[root@centos1 ~]# /etc/init.d/zenoss start
Zenoss not initialized. Performing first-boot initialization...
Fresh install pre steps
Checking RRDtool version >= 1.4.7: [ OK ] 1.4.7
Dropping database: zodb_session
Creating database: zodb_session
Applying schema version: 1
Applying schema version: 2
Applying schema version: 3
Dropping database: zodb
Creating database: zodb
Applying schema version: 1
Applying schema version: 2
Applying schema version: 3
Creating database: zenoss_zep
Applying schema version: 1
Applying schema version: 2
Applying schema version: 3
Applying schema version: 4
Applying schema version: 5
Applying schema version: 6
make zope instance.
Loading initial Zenoss objects into the Zeo database
(this can take a few minutes)
Zenoss initialization complete.
Daemon: zeneventserver starting...
Waiting for zeneventserver to start....................
2014-07-08 10:09:33,487 INFO zen.ZPLoader: Loading /opt/zenoss/ZenPacks/ZenPacks.zenoss.ApacheMonitor-2.1.4-py2.7.egg/ZenPacks/zenoss/ApacheMonitor/objects/objects.xml
2014-07-08 10:09:33,589 INFO zen.AddToPack: End loading objects
2014-07-08 10:09:33,589 INFO zen.AddToPack: Processing links
...
...
Zenpacks were installed. Restarting zenoss.
Daemon: zredis stopping...
already stopped
Daemon: zenprocess stopping...
already stopped
Daemon: zencommand stopping...
already stopped
Daemon: zenperfsnmp stopping...
already stopped
Daemon: zenmodeler stopping...
already stopped
Daemon: zentrap stopping...
already stopped
Daemon: zenactiond stopping...
already stopped
Daemon: zenstatus stopping...
already stopped
Daemon: zensyslog stopping...
already stopped
Daemon: zenping stopping...
already stopped
Daemon: zeneventd stopping...
already stopped
Daemon: zenjobs stopping...
already stopped
Daemon: zenhub stopping...
already stopped
Daemon: zenrrdcached stopping...
already stopped
Daemon: zopectl daemon manager not running
Daemon: zeneventserver stopping...
Daemon: zeneventserver starting...
Waiting for zeneventserver to start........
Daemon: zopectl .
daemon process started, pid=10380
Daemon: zenrrdcached starting...
Daemon: zenhub starting...
Daemon: zenjobs starting...
Daemon: zeneventd starting...
Daemon: zenping starting...
Daemon: zensyslog starting...
Daemon: zenstatus starting...
Daemon: zenactiond starting...
Daemon: zentrap starting...
Daemon: zenmodeler starting...
Daemon: zenperfsnmp starting...
Daemon: zencommand starting...
Daemon: zenprocess starting...
Daemon: zredis starting...
Daemon: zenpython starting...
Daemon: zenjmx starting...
Fresh install post step
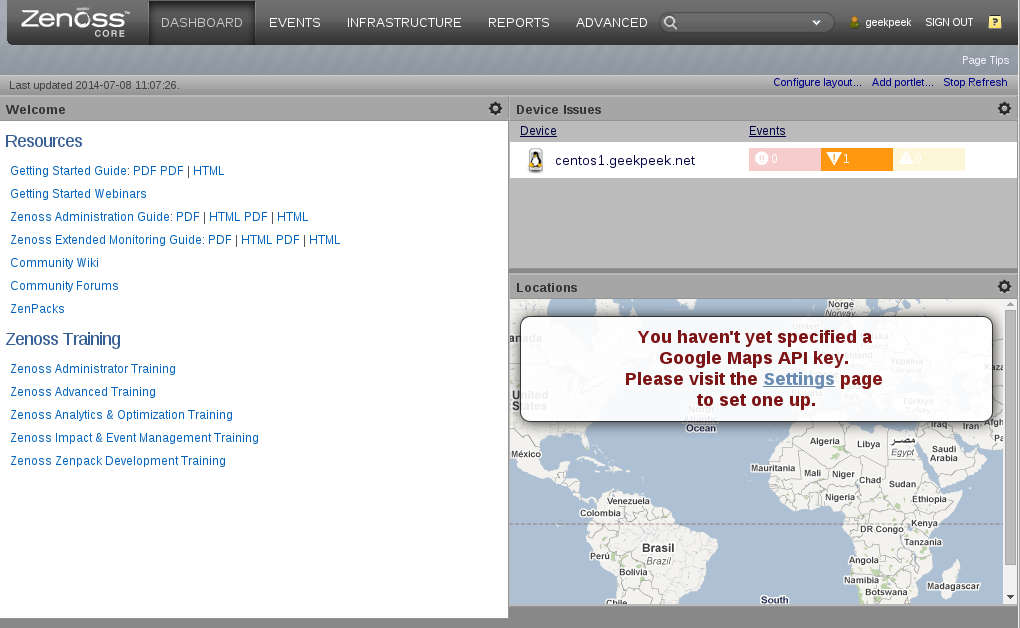
--2014-07-08 10:19:06-- http://centos1.geekpeek.net:8080/zport/dmd/DeviceLoader/loadDevice?deviceName=centos1.geekpeek.net&devicePath=/Server/Linux
Resolving centos1.geekpeek.net... 192.168.10.32
Connecting to centos1.geekpeek.net|192.168.10.32|:8080... connected.
HTTP request sent, awaiting response... 200 OK
Length: unspecified [text/html]
Saving to: “/dev/null”
0K .......... 61.2 =2m56s
2014-07-08 10:22:34 (61.2 B/s) - “/dev/null” saved [10772]
Zenoss installation completed.
DEBUGGING:
- If starting Zenoss fails with “Failed starting rabbitmq — exiting!” please add a line to /etc/hosts with the IP address of the Zenoss server and FQDN and try starting Zenoss again!
- If when you visit web URL only see HTML only output something went wrong at the first time Zenoss run. Please remove Zenoss “yum remove zenoss-4.2.5-2108.el6.x86_64”, reinstall RPM “yum localinstall zenoss_core-4.2.5-2108.el6.x86_64.rpm” and run Zenoss again for the first time.
UPDATE: Thanks to GeekPeek.Net visitor Sujith if you are having problems when accessing the login page for the first time (HTML only view) you can get it resolved by using script from the link HERE.
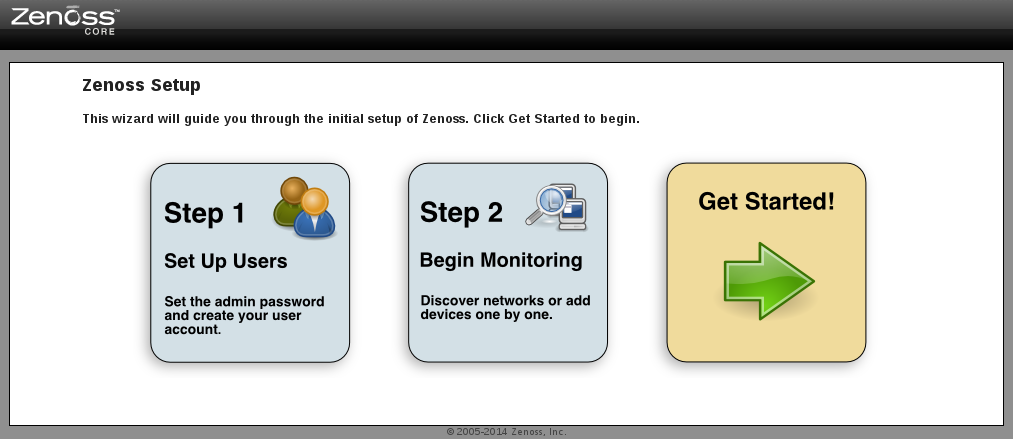
11. Visit Zenoss from Web Browser
Visit http://ip_address_or_hostname:8080 with your browser and follow initial Zenoss steps.
(*접속이 안될경우 확인 사항 시스템에서 netstat -napt | grep 8080으로 Port의 open상태 확인, iptables 확인 후 8080포트 오픈)


12. Make Services Start at Boot
[root@centos1 ~]# chkconfig mysqld on
[root@centos1 ~]# chkconfig zenoss on
[root@centos1 ~]# chkconfig postfix on
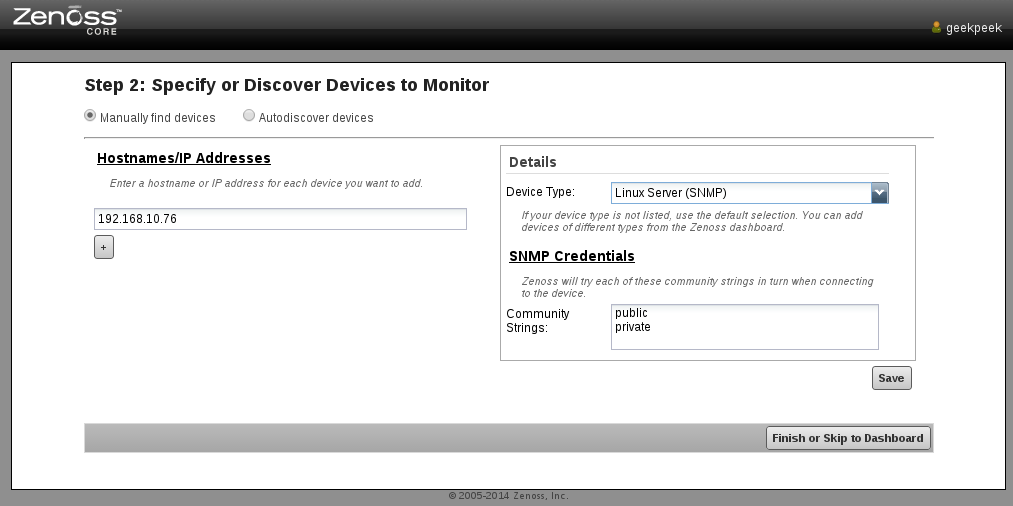
13. Start SNMP Service On Clients
If you want to add clients to Zenoss you first need to start the SNMP service on these clients (usually snmpd daemon) and allow Zenoss Monitoring Server to connect to SNMP daemon via firewall (iptables).
The default port SNMP runs on is 161 UDP and if you leave client SNMP configuration default (community name “public”) most of things should be up and running – of course it is advised to change the SNMP community name accordingly but also configure this when adding clients to Zenoss!
'|관련 프로그램|' 카테고리의 다른 글
| 무료 암호화 프로그램 베라크립트(VeraCrypt) (0) | 2017.01.13 |
|---|---|
| [Netdata] 리눅스 시스템 및 성능 모니터링 프로그램 (0) | 2017.01.12 |
| 리버싱 : 올리디버거(Ollydbg)사용법 (0) | 2014.02.17 |
| WinSCP513 (1) | 2013.12.24 |
| Tor를 이용한 IP우회 (0) | 2013.12.04 |

